|
TA03 Super Low Friction Damper Set for the 1/10 Scale Tamiya RC BMW M-Roadster |
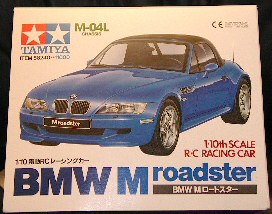
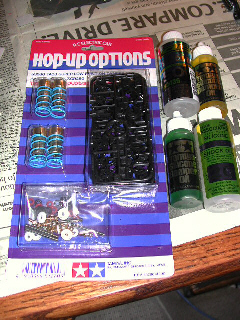
The Tamiya RC BMW M-Roadster kit is a 1/10 scale, rear wheel drive electric model race car. It sits on Tamiya's M-04L chassis (just like their Honda S2000 model). Powered by a Mabuchi 540 stock motor, this model is surprisingly quick out of the box. Unfortunately the handling can be very twitchy and the rear end is somewhat loose (just like the real thing!). This can be alleviated by installing selected "Hop-Up" option kits available through Tamiya and other manufacturers. My first upgrade was the installation of Duratrax sealed ball bearings to replace all plastic bushings. Ball bearings make the car faster and more durable. I also added sway bars (anti-roll bars) to prevent the chassis from leaning excessively during heavy cornering. (Tamiya M-04 Stabilizer Set - part #53382)
The most exciting upgrade comes in the form of Tamiya's TA03 Super Low Friction Damper Set (oil-filled shocks, part #53280). These shocks use actual hydraulic valving like the real thing. Experimenting with different spring rates and shock oil viscosity weights provides a level of tuning that's on-par with the real thing. The text and pictures below record the assembly and installation of this particular upgrade to my RC M Roadster.
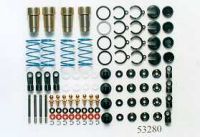
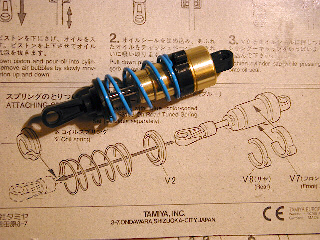
The number of pieces in this kit at first seems intimidating. Take heart, its just one shock times four!
![]()
Pre-order the silicone oil
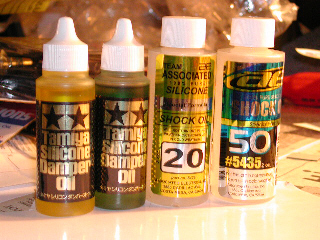
Be sure to order the silicone filler oil ahead of time. The higher the number, the heavier or more viscous the oil. A general rule is to put heavier oil on the front shocks and lighter on the back. I went with 50-front, 20-rear. You can also mix oil weights to "tune" your shocks.
![]()
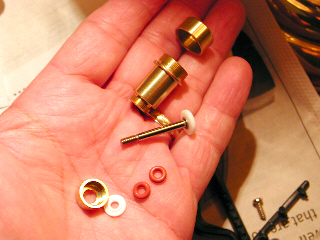
Assembling the shocks
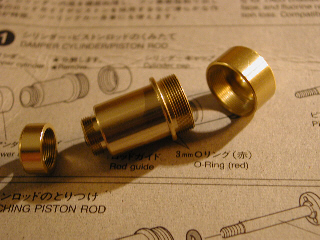
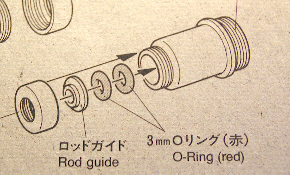
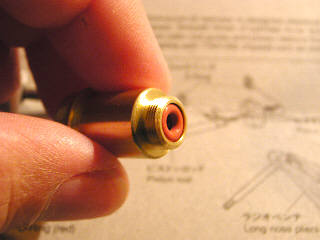

Start by assembling each of the four the Damper Cylinders and Piston Rods. Grab two RED O-rings and tuck them into the bottom of each damper cylinder. Insert the Rod-guide (small white disk) into the lower cap of the damper cylinder. Screw the lower cap onto the cylinder.
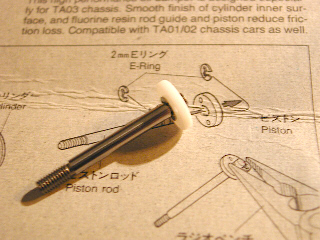
Each piston rod needs two E-Rings and a white piston disk. Snap the e-rings on either side of the piston. You'll need to use a pair of needle-nose pliers.
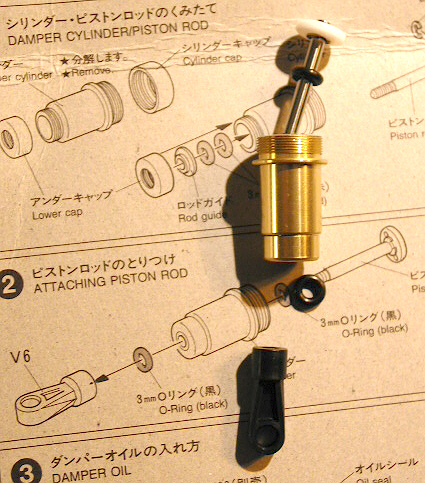
Now insert the piston rod into the damper cylinder. Slip the BLACK o-rings onto the piston rod on opposite sides of the damper cylinder.
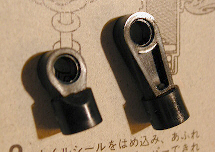
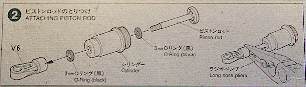
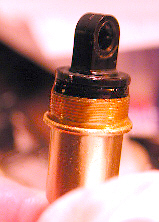
IMPORTANT NOTE The M Roadster M-04L chassis requires the SHORTER of the two available black plastic screw-on piston mounts. Don't make the same mistake I made. Use part # V5 and not #V6 as indicated in instructions.
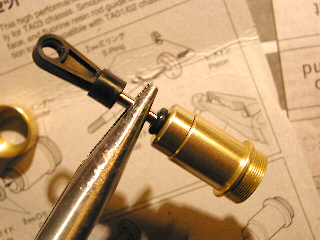
In order to attach the plastic screw-on mount to the piston, you will need to grab the piston with some pliers. Otherwise, you'll never get it on. I ended up using a pair of vice-grips. The piston is made out of some high-grade steel so you can't scratch it. It might be a good idea to pre-assemble the black plastic mount to the piston before hand, just to loosen up the threads. NOTE: I used the wrong V6 piece as shown in the picture above. Remember to use the shorter V5 piece!
![]()
Filling the shocks with silicone oil
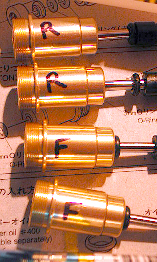
Once you have all four shocks assembled, its time to fill each with silicone oil. This is a good time to label the front and rear pairs since if you intend to fill with different oil weights.
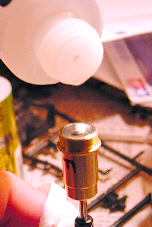
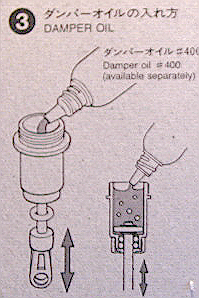
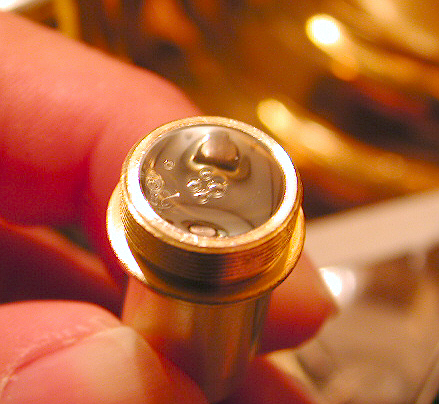
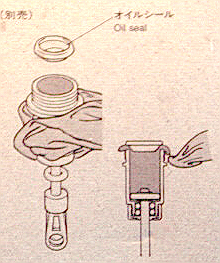
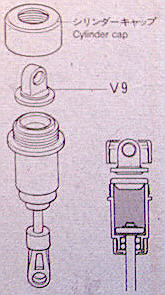
Fill each damper cylinder with your selected weight of silicone oil. Make sure the piston is fully retracted as you fill (extended all the way out). You'll need to get all the air bubbles out of your oil. Do this by slowly moving the cylinder up and down. Once filled and all bubbles are displaced, attach the oil seal (a little black rubber cap). Place the black plastic upper mount (part #V9) on top of the oil seal. Absorb any oil overflow with tissue paper. Tighten the upper cylinder cap while pressing the part V9 onto the oil seal.
Attaching the springs
Attach the springs. Front and rear shocks take parts V7 and V8 respectively.
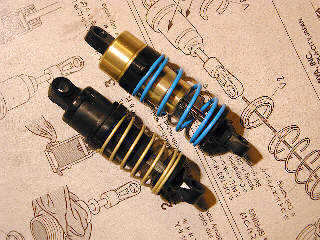
Old versus New
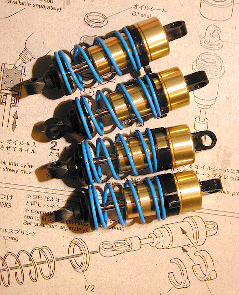
The complete shock set fully assembled and ready to be mounted.
Mount the shocks
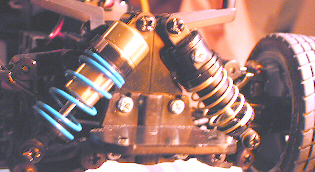
Another comparison of old versus new of front shocks.
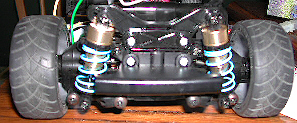
Rear oil-filled shocks mounted. This baby is ready to rock!
Instructions and photos by David Meaux. Special thanks go to Carter Lee for providing loads of tips on putting these cars together. Check out Carter's excellent RC M-Roadster page HERE.